Working from home seems so appealing — until you realize your kitchen table and a rickety chair aren’t exactly helping you crush your goals. The good news? You don’t need a $10,000+ workspace to get the mental relief of a space that actually works for you.
You can build a reasonable budget home office productivity setup for less than $200 — and sometimes quite a bit less. So whether you’re a student, recently working from home after years in an office, or a new freelancer ready to get serious about your work setup, this guide breaks down nine practical beginner setups that you can implement right now.
Let’s get into it.
Workspaces: Why Your Setup Actually Matters
Jumping right into the setups, here’s a brief truth: your environment has a significant impact on how well you are able to work.
Research has proven that a messy, poorly-designed workspace decreases efficiency and increases distractions. On the other hand, a designated, tidy area — even a small one — communicates to your brain that it’s time to buckle down.
You don’t need an expensive standing desk or a $500 monitor. There’s a particular balance of comfort, organization, and light that you have to get right. That’s precisely what these setups provide you with.
Setup 1: The Simple Desk Nook
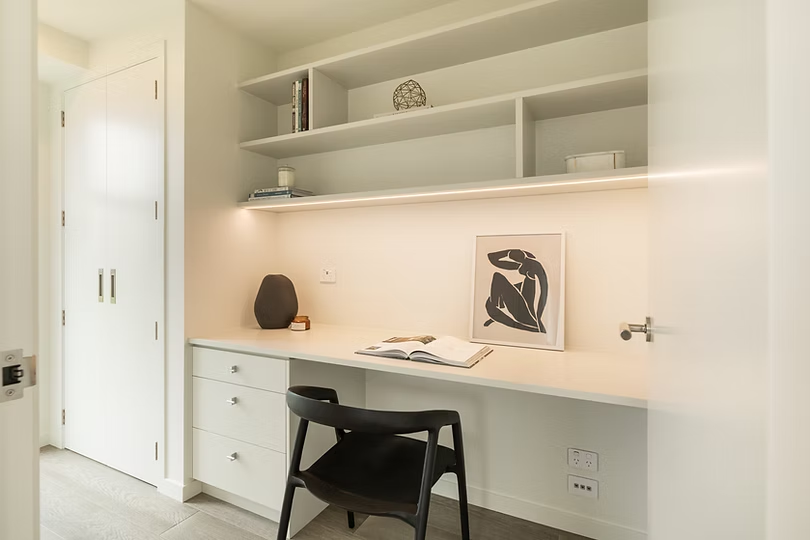
Best for: Students, writers, and anybody who gets by with just a laptop
Sometimes less really is more. The minimalist desk corner setup boils things down to the essentials — and the simplicity is a real boon for those who are easily distracted.
What You Need
| Item | Estimated Cost |
|---|---|
| Foldable wall-mounted desk | $30–$60 |
| Basic desk lamp | $10–$20 |
| Laptop stand | $15–$25 |
| Cable organizer clips | $5–$10 |
| Total | $60–$115 |
How to Set It Up
Find a quiet corner in your room or living space. Attach a small wall-mounted fold-down desk — they’re great because they collapse when you’re done, saving space. Add a simple lamp for focused illumination, and use a laptop stand that keeps your screen at eye level.
Keep the surface clean. No excess papers, no miscellaneous objects. Simply your laptop, a notebook, and perhaps a cup of coffee.
Pro Tip: Hang a small corkboard above the desk to post your daily list of tasks. It keeps goals in view without occupying desk space.
Setup 2: The Secondhand Desk Refit
Best for: Thrift shoppers and design amateurs
You don’t have to buy new. Some of the best home office setups are pieced together from furniture purchased at thrift stores, Facebook Marketplace, or garage sales.
The Core Idea
Find a used desk for $10–$40. Sand it down if necessary, put on a coat of paint or wood stain and boom — you have a custom-looking workspace for a fraction of the price.
Pair it with:
- An office chair that’s been previously owned (try to find one with lumbar support)
- A budget monitor or second screen
- A desk organizer tray
Cost Breakdown
| Item | Thrift/Secondhand Cost |
|---|---|
| Used desk | $10–$40 |
| Used ergonomic chair | $20–$50 |
| Budget desk organizer | $5–$15 |
| Paint or stain | $10–$20 |
| Total | $45–$125 |
It’s one of the most earth-friendly setups on this list, too. You’re also helping keep furniture out of landfills while saving money.
Setup 3: The IKEA Hack Workstation
Best for: Anyone looking to furnish a room on a budget that still looks polished
IKEA is known for its low-cost, mix-and-match furniture. But here’s where things get interesting — the IKEA “hack” community has cracked the code on how to transform basic IKEA pieces into high-end-looking workstations.
Popular IKEA Hack Combos
The ALEX + LINNMON Combo LINNMON tabletop (~$30) + ALEX drawer unit (~$90) = a desk with storage that looks like it costs $300+
The KALLAX Desk A sideways KALLAX shelf unit turns into a desk, with cubby storage underneath.
Why This Works
IKEA pieces are easy to customize. You can replace the handles, add a pegboard up top, or attach a monitor arm for an uncluttered and professional look.
Budget estimate: $80–$150 for the complete setup
Setup 4: The Low-Cost Standing Desk
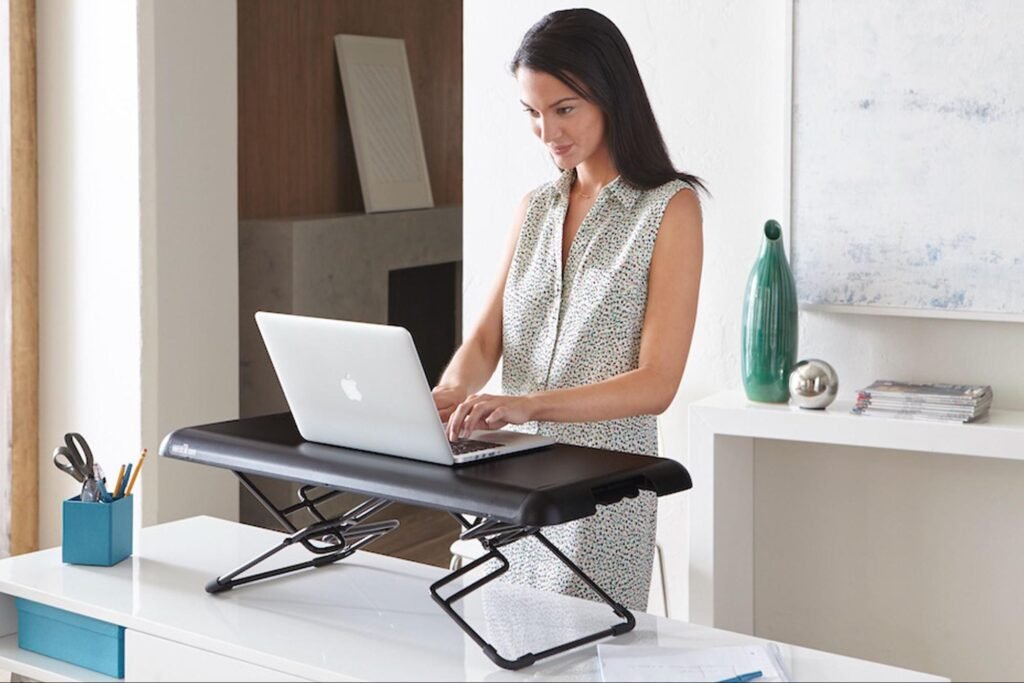
Best for: Those who log long hours of sitting and are looking for better posture
You may be aware that sitting all day is not good for your health. Standing desks help — but traditional ones can cost $400–$1,000+.
Here’s how to reap the rewards without the price tag.
Budget Standing Desk Options
Option A: Stand-Up Desk Riser These perch on your current desk and let you alternate between sitting and standing. Cost: $50–$80.
Option B: DIY Shelf Stack Stack some relatively heavy books or a shelf riser under your laptop to convert it into a makeshift standing position. Cost: $0–$20.
Option C: Inexpensive Electric Desk Flexible options from brands like Flexispot and Vivo are available for $150–$200 with their entry-level electric standing desks. Not free, but a lot cheaper than most.
| Standing Desk Option | Cost Range |
|---|---|
| Desktop riser | $50–$80 |
| DIY book stack | $0–$20 |
| Budget electric desk | $150–$200 |
Important: If you take the standing route, buy an anti-fatigue mat. Spending hours standing on hard floors is tough on both your feet and back. Basic mats start at $20.
Setup 5: The Dual Monitor Setup for Under $150
Best for: Freelancers, coders, and multitaskers
Having two screens makes a huge difference in productivity. Say goodbye to constant tab switching. You can keep your email open on one screen and get your work done on the other.
How to Build It Cheap
Step 1: Get a budget monitor. Companies such as AOC, Sceptre, and Acer offer 21–24 inch displays for $80–$120.
Step 2: Set up your laptop as a second screen. Most laptops support extended display via an HDMI or USB-C cable.
Step 3: Free up desk space by mounting both screens to a dual monitor arm ($25–$40).
Step 4: Purchase a simple keyboard and mouse combo ($15–$30) for your external setup.
Full Cost Estimate
| Item | Cost |
|---|---|
| Budget monitor | $80–$120 |
| HDMI/USB-C cable | $8–$15 |
| Monitor arm | $25–$40 |
| Keyboard + mouse combo | $15–$30 |
| Total | $128–$205 |
This kind of setup is especially potent for anybody designing, writing, editing video, or doing any type of research-heavy work.
Setup 6: The Apartment Corner Setup
Best for: Individuals who live in small spaces such as studios or shared apartments
No extra room? No problem. This setup is all about creating a functional workspace in a small living space — without taking over your entire home.
Smart Space-Saving Ideas
Use a Murphy Desk A Murphy desk folds flat against the wall when not in use. It looks like a cabinet. Open it up, and there’s your desk. Prices range from $80–$150.
Add a Room Divider A simple folding divider ($30–$50) establishes a physical separation between “work mode” and “relax mode” — even in a one-room apartment.
Go Vertical Wall shelves above the desk store supplies, books, and plants without taking up floor space. IKEA’s LACK wall shelves cost about $10–$15 each.
Psychological Benefit
A designated work zone — even in a small space — trains your brain to associate that location with focus. It’s a small but potent shift.
Total estimated budget: $120–$215
Setup 7: The Natural Light Power Setup
Best for: Anyone who experiences eye strain or energy dips during the day
Lighting is one of those things that most people don’t really pay attention to, but it makes an enormous difference in how you feel and focus. Natural light is the best — and it’s free.
How to Maximize Natural Light
- Set up your desk so that light comes from the side, rather than directly behind or in front of your screen (to minimize glare)
- Use light-filtering curtains, not blackout drapes, during work hours
- Keep your windows clean — dirty windows block far more light than you might think
When Natural Light Isn’t Enough
Get a daylight LED desk lamp. These mimic natural sunlight and help alleviate eye fatigue. Good ones cost $20–$40.
You could also try a SAD light (seasonal affective disorder light), which mimics bright daylight. They start at $30 and are particularly beneficial in winter months or rooms with small windows.
According to the American Optometric Association, proper lighting is one of the most important factors in preventing digital eye strain — a condition affecting millions of remote workers today.
| Lighting Upgrade | Cost |
|---|---|
| Daylight LED desk lamp | $20–$40 |
| SAD/light therapy lamp | $30–$60 |
| Sheer curtains | $10–$25 |
Bonus: Good lighting can result in fewer headaches and less eye strain. That alone boosts productivity.
Setup 8: The Ergonomic Budget Setup
Best for: Anyone sitting 5+ hours a day at their desk
Comfort is not a luxury — it’s a productivity tool. When your back hurts or your wrists throb, you lose focus. You take more breaks. You get less done.
You don’t have to spend a lot for an ergonomic setup. Here’s how to create one on a budget.
The Key Ergonomic Checkpoints
Monitor height: The top of your screen should be at or slightly below eye level. Elevate it with a monitor stand or a stack of books.
Chair height: Feet flat on the floor. Your knees should be bent at 90 degrees.
Keyboard and mouse position: Your elbows should be tucked into your body, at a 90–110 degree angle.
Back support: If your chair has no lumbar support, roll up a small towel and place it behind your lower back.
Budget Ergonomic Gear
| Item | Budget Pick | Cost |
|---|---|---|
| Office chair | Hbada or Furmax | $60–$90 |
| Monitor stand | Amazon Basics | $15–$25 |
| Wrist rest pad | Any brand | $8–$15 |
| Laptop riser | Nulaxy or similar | $15–$25 |
| Total | $98–$155 |
Quick Reminder: Take a 5-minute break every hour. Stand up, stretch, walk around. No setup replaces regular movement.
Setup 9: The All-in-One Productivity Station
Best for: Those who want a full, streamlined setup right off the bat
This final setup combines all of it — ergonomics, organization, lighting, and tech — into one seamless workspace. This is the most complete option on this list and still falls under $250.
What Goes Into It
- Desk: An inexpensive IKEA or Amazon desk ($40–$70)
- Chair: A budget ergonomic chair ($60–$90)
- Lighting: A daylight desk lamp ($20–$30)
- Tech: Budget monitor or laptop stand, keyboard, and mouse ($50–$80)
- Organization: Desk tray, cable clips, small shelf or pegboard ($20–$35)
- Comfort: Wrist rest and lumbar cushion ($15–$25)
Full Setup Cost Estimate
| Category | Item | Cost |
|---|---|---|
| Furniture | Desk + Chair | $100–$160 |
| Tech | Monitor/stand + peripherals | $50–$80 |
| Lighting | Daylight lamp | $20–$30 |
| Organization | Trays + cables + shelf | $20–$35 |
| Comfort | Wrist rest + lumbar pillow | $15–$25 |
| Grand Total | $205–$330 |
Sure, this one crosses slightly over the $200 threshold depending on customization — but it’s still much cheaper than most pre-packaged “home office bundles” that retail for $500–$800+.
For more ideas on how to put together a complete desk setup that fits your budget and style, check out Remote Work Desk Setup — a great resource packed with practical tips for building your ideal workspace from scratch.
Quick Overview: All 9 Setups at a Glance
| Setup | Best For | Estimated Cost |
|---|---|---|
| Minimalist Desk Corner | Students, writers | $60–$115 |
| Secondhand Desk Makeover | DIY fans | $45–$125 |
| IKEA Hack Workstation | Style on a budget | $80–$150 |
| Standing Desk on a Budget | Long-hour workers | $50–$200 |
| Dual Monitor Setup | Multitaskers, coders | $128–$205 |
| Tiny Apartment Nook | Small space living | $120–$215 |
| Natural Light Power Setup | Eye strain fighters | $60–$125 |
| Ergonomic Budget Setup | 5+ hour desk workers | $98–$155 |
| All-in-One Productivity Station | Complete beginners | $205–$330 |
5 Quick Win Strategies to Elevate Your Budget Home Office Setup
Regardless of which setup you use, these five tips cost little to nothing and make a true difference:
- Clear your desk every evening. A clean slate the following morning clears your mind before you even get started.
- Use headphones with noise cancellation. Even affordable options ($20–$40) do a good job of blocking out household noise.
- Maintain a visible physical to-do list. A sticky note or little whiteboard keeps priorities front and center.
- Set a remote work hours schedule and stick to it. Being consistent teaches your brain to focus during those hours.
- Add one plant. Even a single, small plant can boost mood and air quality, research indicates. A small succulent costs $3–$8.
FAQs: Budget Home Office Productivity Setup
Q: What’s the least amount of money I can get away with spending to establish a work-at-home office?
If you already have a laptop, you can create a functional workspace for $40–$60. Even a basic desk ($20–$40), an ordinary chair, and light from a window can be enough to get started. Over time, as your budget allows, upgrade.
Q: Is it really worth spending money on an ergonomic chair?
Yes — especially if you work more than 3–4 hours a day. Bad posture and back pain aren’t just uncomfortable; they cost you energy and focus. A budget ergonomic chair ($60–$90) is one of the best long-term productivity investments you can make.
Q: Can I set up a home office in a small apartment with no extra room?
Absolutely. Setup 6 (the Apartment Corner Setup) is custom-built for this scenario. Murphy desks, room dividers, and high vertical shelving can create a dedicated workspace even in a studio apartment.
Q: What is the single biggest upgrade I can make to my current setup?
If you’re using a laptop on its own, a monitor or external display is your biggest upgrade. It frees up more screen real estate and decreases strain on your neck. You should be able to find a decent one for $80–$120.
Q: How can I keep my home office organized on a tight budget?
Try free or inexpensive solutions first: repurpose shoeboxes as drawer organizers, use binder clips as cable holders, and use mason jars for pens and scissors. Dollar stores and thrift shops are goldmines for desk organization tools.
Q: Do I need specific lighting for a home office?
Natural light is the best, but if you don’t have much of it, a daylight LED desk lamp helps significantly. Opt for one with a 5000K color temperature or higher — it’s similar to natural sunlight and keeps you alert. Budget versions run $20–$40.
Q: As a beginner, is it worth investing in a standing desk?
A standing desk is a nice step up, but not necessarily something you need right away. Start with what you have. If you’ve noticed that long hours of sitting result in stiffness or fatigue, then a budget desktop riser ($50–$80) is the first step to take.
Wrapping It All Up
Creating a great budget home office productivity setup is absolutely doable — even if you’re starting with next to no money. The trick is to focus on what directly makes an impact on your work: comfort, light, organization, and a dedicated space you associate with focus.
You don’t have to do it all at once. Choose one setup from this list that best suits your needs and budget. Get that working well. Then add to it over time.
A $60 rig that you genuinely use every day is better than a $2,000 setup that leaves you feeling bad about not working.
Start small. Stay consistent. Your workspace will expand in tandem with your goals.
