Imagine this: You’re sitting down to work. Your desk is clear. Everything has a place. There’s nothing in front of you other than what you really need.
How does that feel?
For many, it seems unattainable. The average home desk hoards non-functioning pens, random cables, stale receipts, sticky notes, and coffee mugs that may never return to the kitchen. Before long, the clutter sets in — and with it, the stress.
Here’s the thing: an untidy desk is more than just a visual blight. It actively hurts your work. Research has found that visual clutter competes for your attention and slows down your thinking, sapping mental energy before the workday even truly begins.
The good news? You do not need a full home makeover. All you need is the proper setup.
This article presents 11 simple, practical, and affordable home office productivity setups that could help you build and keep a clutter-free desk. You’ll find a setup that suits your space and style here, whether you’re working out of a tucked-in apartment or a dedicated home office.
Let’s set the record straight — literally.
The True Cost of an Overstuffed Desk
Before we get into the setups, it’s good to know why clutter is such a big deal.
A Princeton University Neuroscience Institute study found that multiple objects in your visual field compete for your attention simultaneously. The more clutter on your desk, the harder your brain works — even just to tune it all out.
That mental effort adds up. It leads to:
- Slower task switching
- Lower quality decision-making
- Higher stress and anxiety levels
- Reduced creativity and focus
A tidy desk isn’t just visually appealing. It creates space for your brain to breathe — and that translates directly into better, speedier, and more pleasant work.
Before You Choose a Setup: Answer These Questions
Not every setup works for everyone. Before you select yours, take a quick look at your own situation:
| Question | Why It Matters |
|---|---|
| How much desk space do you have? | Determines what storage solutions will fit |
| What do you use every single day? | Helps you decide what stays on the desk |
| What kind of work do you do? | Creative work requires different tools than coding or writing |
| Do you share the space with others? | Shared spaces require flexible, compact arrangements |
| What’s your budget? | Some setups cost under $50, others take more investment |
| Do you prefer digital or paper systems? | Affects what your actual physical storage needs are |
Armed with a clear picture of your space, choosing the right clutter-free desk setup becomes a breeze.
11 Simple Home Office Productivity Setups for a Clutter-Free Desk
Setup 1: The One-Surface Rule Desk
This setup rests on a single strong idea: the surface of your desk is solely for working — not storing.
Everything that will not help you complete the current task moves clear off the desk. That means no piles of paper, no excess gadgets, no knickknacks that take up room. Just your laptop or monitor, a keyboard, and perhaps a notebook.
The one-surface rule requires you to find appropriate homes for everything else — drawers, shelves, bins, or boxes. Once everything is put in its place, the desk stays clean almost by default.
What you need:
- A desk with at least one drawer
- A small shelf or cabinet nearby
- One inbox tray for papers that need attention
- A designated place for your phone (off the desk when not in use)
Why it works:
- No visual clutter = no distraction
- Takes about 30 seconds to clean up at the end of the day
- Instantly makes your workspace feel twice as large
Best for: The easily distracted, minimalists, and those who mostly use digital tools.
Pro tip: Do a two-minute “desk reset” at the end of each workday. Before you shut down, put everything back where it belongs. Tomorrow-you will be very grateful.
Setup 2: The Vertical Storage System
When there isn’t enough horizontal space on your desk, the answer is straightforward — go vertical.
With a vertical storage system, the wall space above your desk stores everything you need without encroaching on your work surface. Think wall-mounted shelves, hanging organizers, pegboards, and magnetic strips. The desk remains clear yet everything is reachable.
This makes it one of the most effective home office productivity setups possible, since it works in virtually any space and at almost any budget.
Vertical storage ideas:
- Floating shelves above the desk for books, files, and supplies
- Pegboard for headphones, pens, scissors, and cables
- Magnetic wall strips for metal tools or small items
- Wall file holders for papers and folders
- Over-monitor shelf riser for a second level of desk storage
Why it works:
- Keeps your desk surface fully clear
- Everything is visible and within reach
- Fits into small areas where floor or desk space is limited
Best for: Small desks, apartment setups, or anyone who wants useful things close at hand without the mess.
| Storage Tool | Best For | Approx. Cost |
|---|---|---|
| Floating shelves | Books, folders, plants | $15–$50 |
| Pegboard | Pens, cables, headphones | $20–$40 |
| Magnetic wall strip | Metal tools, clips | $10–$25 |
| Wall file holder | Papers, notebooks | $10–$30 |
| Monitor shelf riser | Small items, notes | $20–$45 |
Setup 3: The Cable-Free (or Cable-Hidden) Desk
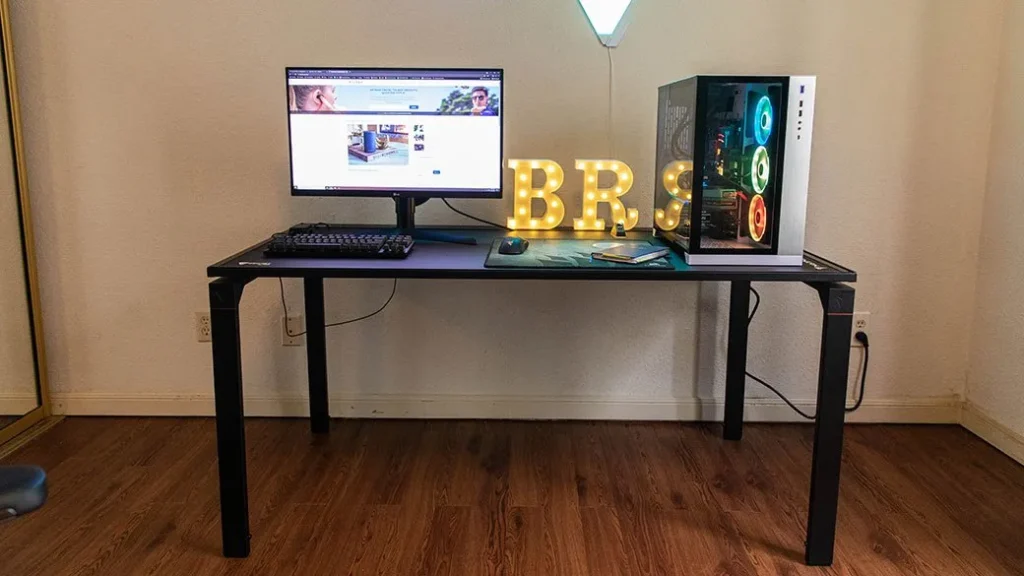
There’s nothing that makes a desk messier than a tangle of cables.
Power cables, charging cables, monitor cables, headphone cables — they build up quickly. And even if every other aspect of your desk is clean, exposed cables make the entire setup look chaotic.
A cable-managed desk directly addresses this problem. The objective is to avoid cables altogether (by going wireless) or to conceal them so well that they’re invisible.
How to do it:
- Go wireless wherever possible: Wireless keyboard, wireless mouse, wireless charging pad
- Cable management tray: Attaches to the underside of the desk and covers power strips and excess cable length
- Cable clips: Attach to the back edge of the desk, routing cables neatly along the surface
- Cable sleeve: Gathers several cables into one organized bundle
- Velcro ties: Inexpensive, reusable, and bundle cables out of sight behind or under the desk
Why it works:
- Eliminates the number one source of visual clutter on most desks
- Easier to clean — no more dusting around a cable jungle
- Gives the desk a sleek, intentional look
Best for: Anyone with more than one device, two monitors, or a standing desk that moves up and down.
Pro tip: Use a small sticker or colored tape to label each cable at both ends. Whenever you need to unplug something, you’ll know exactly which cable to grab.
Setup 4: The Paper Inbox-Outbox System
Paper is sneaky. It starts as one sheet. Then it’s a small pile. Then it’s an avalanche.
For those who work with physical documents — invoices, contracts, notes, reference sheets — a simple inbox-outbox system is among the easiest clutter-free desk setups you can create.
Here’s how it works:
- Inbox tray: Every new piece of paper goes here. Unopened mail, handwritten notes, printed documents — all of it lands in this one spot first.
- Outbox tray: Anything that needs to leave your desk (mail to send, papers to file, documents to hand off) goes here.
- Action folder: Papers requiring immediate attention each get their own dedicated folder. Nothing else goes in it.
- File it or trash it: Anything that doesn’t need action gets filed immediately or thrown away. No paper lives on the actual desk surface.
Why it works:
- Eliminates random paper piles entirely
- Creates a clear system so nothing gets lost
- Takes under five minutes to set up
Best for: Freelancers, business owners, teachers, or anyone who handles physical paperwork regularly.
The golden rule of paper: If it doesn’t require action and you don’t need to keep it, toss it out immediately. Most paper clutter exists because people postpone that decision.
Setup 5: The Drawer Organizer Setup
Everyone has a desk drawer. Very few people actually organize it.
Instead, it turns into a junk drawer — full of pens that don’t work, batteries, rubber bands, old receipts, and things that haven’t been touched in three years.
A well-organized desk drawer is one of the most powerful clutter-free tools you have. When your drawer is organized, everything that used to live on your desk can have a home in there instead.
How to set it up:
- Purchase a drawer organizer insert (adjustable grid trays work best)
- Sort items into categories: writing tools, tech accessories, stationery, miscellaneous
- Only keep items you use at least once a week
- Everything else goes into storage elsewhere or gets tossed
Drawer layout example:
| Section | What Goes Here |
|---|---|
| Front left | Pens and pencils (only working ones) |
| Front right | Sticky notes, paper clips, rubber bands |
| Back left | Tech: earbuds, USB drives, adapters |
| Back right | Miscellaneous: stamps, batteries, etc. |
| Center slot | Scissors, ruler, stapler |
Why it works:
- Keeps your entire desk surface completely clear
- Makes finding things faster — no more rummaging
- Turns a useless junk drawer into a productivity tool
Best for: Everyone. Seriously — this one applies to every single setup on this list.
Setup 6: The Monitor Riser Setup
A monitor riser does double duty: it raises your screen to a healthier eye level and creates usable storage space underneath.
That hidden shelf below your monitor is ideal for a keyboard when not in use, a small notebook, your phone, a wireless charger, or a pen tray. It’s additional storage space that wasn’t there before — and it keeps all those items off the main desk surface.
Types of monitor risers:
- Simple wooden riser: Clean, minimal, affordable ($15–$40)
- Riser with built-in drawers: Adds small storage compartments ($30–$80)
- Bamboo riser: Eco-friendly and stylish ($20–$60)
- Monitor arm: Mounts to the desk edge, lifts the monitor completely, frees up the entire footprint of the monitor stand ($30–$120)
Why it works:
- Creates storage space where there was none
- Raises the screen to eye level to improve posture
- Makes the desk feel more organized and intentional
Best for: Anyone who uses a desktop monitor, particularly in tight quarters.
Health bonus: When sitting up straight, the top of your monitor should be approximately at eye level. Most people position their monitors too low, leading to neck and shoulder strain over time.
Setup 7: The Paperless Digital Solution

One of the most effective ways to keep a desk clutter-free is to minimize physical paper to nearly nothing.
A digital-first setup means swapping physical items — notebooks, sticky notes, printed documents, calendars — for their digital equivalents. Less paper means less clutter. Less clutter means a cleaner desk. A cleaner desk means a clearer mind.
Digital substitutes for everyday desk items:
| Physical Item | Digital Alternative |
|---|---|
| Paper notebook | Notion, Obsidian, Apple Notes, Google Keep |
| Sticky notes | Sticky Notes app, Trello, Todoist |
| Printed calendar | Google Calendar, Fantastical |
| Printed documents | Google Drive, Dropbox |
| Physical to-do list | Todoist, TickTick |
| Reference manuals | PDF files, bookmarked web pages |
Why it works:
- Eliminates the biggest source of physical clutter (paper)
- Everything is searchable and accessible from anywhere
- Reduces printing costs and environmental waste
Best for: Remote workers, writers, developers, or anyone who primarily works on a computer.
Important note: Transitioning to paperless takes time. Start with just one area — for example, replacing sticky notes with a digital app — and build from there. Don’t try to change everything at once.
Setup 8: The Morning Reset Routine Setup
Sometimes the issue has nothing to do with your physical setup. It’s the habit.
A morning reset routine setup means designing both your desk and your schedule around a daily tidying ritual — one that takes under five minutes and primes you for a productive day.
Here’s what a simple morning desk reset looks like:
- Clear anything that doesn’t belong on the desk
- Put away everything that was used the night before
- Set out only what you need for your first task
- Fill your water bottle or grab your coffee
- Open your task list and choose your top three priorities
This works because it establishes a clean starting point for every new day. Even if your desk gets messy during the day, you always return to zero by the next morning.
Why it works:
- Builds a consistent habit instead of relying on willpower
- Signals to your brain that it’s time to focus
- Takes five minutes but saves hours of fragmented, distracted work
Best for: Anyone who has trouble maintaining long-term tidiness, or people whose desks slowly return to clutter after a clean.
Pair this with: A “desk reset” at the end of each workday too. Morning reset to start fresh, evening reset to finish clean.
Setup 9: The Dedicated Charging Station
Phones, tablets, smartwatches, wireless earbuds, laptops — today’s workers have a lot of devices. And they all need to be charged. Without a system, cables and chargers become strewn across the desk, instantly creating clutter.
A dedicated charging station solves this problem in one move.
Choose one spot — preferably away from your main work area, or on a small side table — and designate it the official charging station. Every device goes there when it needs power. Nothing charges in the middle of your workspace.
How to build a charging station:
- A small multi-port USB charging hub ($20–$50) handles most devices
- A wireless charging pad ($15–$40) eliminates cables for compatible devices
- A small tray or box keeps the station contained and neat
- A cable organizer or short cables prevent tangles
Why it works:
- Clears all charging cables from your primary workspace
- Creates one obvious, consistent place for all devices
- Reduces the “where’s my charger?” frustration significantly
Best for: Those with multiple devices, families sharing a workspace, or people who find cables constantly migrating across their desk.
Setup 10: The Everything-Has-a-Home Setup
This setup has nothing to do with buying new furniture or gadgets. It’s about one simple discipline: every single item in your workspace has a specific, designated home — and it always goes back there.
No more “I’ll put it away later.” No more “I’ll just leave it here for now.” Every pen, every cable, every sticky pad, every device — there is exactly one place for each.
This sounds obvious. But the majority of desk clutter occurs precisely because items don’t have an assigned home. They get set down anywhere, and there they stay.
How to implement it:
- Conduct a full desk audit: pick up every item and decide where it belongs
- Label drawers, bins, and shelves if it helps you remember
- If something doesn’t have a home, either give it one or get rid of it
- Do a weekly five-minute “home check” to return anything that has drifted
Why it works:
- Addresses the root cause of clutter, not just the symptoms
- Becomes automatic over time — tidying happens without thinking
- Works for every desk size, budget, and work type
Best for: People who keep re-cluttering after cleaning, or anyone who has tried other organization systems and found them too complicated to maintain.
Setup 11: The Hybrid Analog-Digital Workspace
Some people work best digitally. Others need the feel of pen on paper. Most of us fall somewhere in the middle.
The hybrid analog-digital setup acknowledges this and builds a clutter-free system around it. The trick is giving each type of tool its own clear, contained home — so neither digital cables nor paper piles take over the desk.
How it looks in practice:
- One notebook on the desk (not three)
- One pen cup with only the pens you actually use
- One monitor or laptop, managed with a monitor arm or riser
- A small desk pad or leather mat that visually defines the “work zone”
- Digital tools for anything that doesn’t need to exist as a physical object
The desk pad is a particularly clever trick. It creates a visual boundary around your workspace. Everything within the pad is your active workspace. Everything outside it is storage or decoration. It immediately makes any desk feel more organized.
Why it works:
- Takes the best from both analog and digital ways of working
- The desk pad trick visually contains clutter even on busier days
- Feels personal and intentional — without being sterile
Best for: Creative workers, writers, planners, or anyone who loves their notebook and laptop in equal measure.
For even more desk setup ideas and gear recommendations, visit Remote Work Desk Setup — a great resource dedicated to helping remote workers build cleaner, more efficient workspaces.
Side by Side: All 11 Setups at a Glance
| Setup | Core Idea | Best For | Approx. Cost |
|---|---|---|---|
| One-Surface Rule | Nothing on the desk that isn’t in use | Minimalists, digital workers | $0–$30 |
| Vertical Storage | Use wall space, not desk space | Small desks, busy workers | $30–$100 |
| Cable-Free Desk | Hide or eliminate all cables | Multi-device users | $20–$80 |
| Inbox-Outbox System | Control paper flow | Paper-heavy workers | $10–$30 |
| Drawer Organizer | Organize what’s inside the desk | Everyone | $10–$40 |
| Monitor Riser | Raise screen, create under-storage | Desktop monitor users | $15–$120 |
| Paperless Digital Setup | Replace paper with digital tools | Remote/digital workers | $0–$30 |
| Morning Reset Routine | Build a daily tidying habit | Habit-builders | $0 |
| Charging Station | One place for all devices | Multi-device households | $20–$80 |
| Everything Has a Home | Assign a place to every item | Re-clutterers | $0–$50 |
| Hybrid Analog-Digital | Balance paper and digital tools | Creative workers | $20–$70 |
6 Desk Habits That Actually Prevent Clutter
No setup in the world works if the habits aren’t there. Here are six small habits that keep any home office productivity setup working for the long haul:
1. The two-minute rule. If something can be put away or dealt with in less than two minutes, do it immediately. Take care of small tasks right away so they don’t accumulate.
2. One in, one out. Every time a new item comes onto your desk, an old one leaves. This stops clutter from building up over time.
3. Weekly desk audit. Once a week, spend five minutes making sure everything is back where it belongs. Catch clutter before it gets out of hand.
4. End-of-day reset. Before you close your laptop, take two minutes to return everything to its home. Start every morning with a clean desk.
5. Question every item. Before placing anything on your desk permanently, ask: do I use this every day? If the answer is no, it belongs in a drawer or somewhere else.
6. Go paperless by default. Unless there is a compelling reason to use a physical option, choose digital when possible. The less paper that enters your workspace, the less paper you have to manage.
FAQs About Home Office Productivity Setups for a Clutter-Free Desk
Q: How can I keep my desk clear of clutter when I have a lot of work materials? A: Vertical storage is key, along with a solid system for organizing what you need. Use floating shelves, wall-mounted file holders, and drawer organizers to remove items from the desk surface. Keep only what you’re currently using for the task at hand on your desk itself.
Q: What’s the single most impactful change I can make right now for a clutter-free desk? A: Cable management. It’s the quickest, cheapest, and most visually striking change you can make. Tucking away your cables can make any desk look 50% cleaner before you even touch anything else.
Q: How long does it take to set up a clutter-free desk system? A: The initial setup takes about one to two hours — clearing everything, deciding what stays, assigning homes for items, and organizing storage. After that, maintenance takes two to five minutes per day if you follow a reset routine.
Q: Is a minimalist desk actually better for productivity, or does it just look better? A: Both. Research from the Princeton University Neuroscience Institute confirms that visual clutter reduces focus and increases cognitive load. According to research published in the Journal of Environmental Psychology, workspace organization has a measurable impact on cognitive performance and overall wellbeing. A cleaner desk genuinely helps you concentrate, make decisions, and keep your energy up throughout the workday.
Q: How do I handle items I use occasionally but not every day? A: Keep them within reach but off the desk surface. A nearby drawer, shelf, or rolling cart works well. The idea is that your desk holds only what you’re using right now — everything else should be just one arm’s reach away at most.
Q: Can a clutter-free setup work if I share my desk with someone else? A: Yes, but you need clear agreements in place. Give each person their own storage zone (a drawer, a shelf, a tray) and agree on shared rules — like the end-of-day reset. Labeled storage makes it easy for both people to know where things belong.
Q: What’s the ideal desk size for a clutter-free setup? A: Surprisingly, a smaller desk often encourages better habits — there’s simply less surface area available to pile things on. For most people, a desk between 40 and 60 inches wide is ideal. Anything larger can start to feel like an invitation to spread out.
Q: Do I need to spend a lot of money to get a clutter-free desk? A: Not at all. Several of the setups in this article cost nothing or close to nothing — the one-surface rule, the morning reset routine, and the everything-has-a-home system are all free. If you’re resourceful, you can build a complete, tidy workspace for under $50.
Your Clutter-Free Desk Starts Today
Here’s what it all boils down to: a tidy desk isn’t a luxury. It’s a productivity tool.
Every single item on your desk is fighting for a slice of your attention. Every cable, every random pen, every piece of paper you meant to file last week — they’re all quietly depleting your focus. Clearing them out isn’t merely about aesthetics. It’s about giving your brain the clean, uncluttered environment it needs to do its absolute best work.
The 11 home office productivity setups in this guide offer you real, actionable options — whether that means starting from scratch or trying to wrangle a desk that’s already gotten out of hand. You don’t have to implement all of them. Pick one that resonates. Try it for a week.
You will see the difference sooner than you think.
A clear desk leads to a clear mind. And a clear mind plays into better work, less stress, and more of those golden days when everything somehow seems to gel.
Start with one setup. Build one habit. And watch what happens to your workday.
