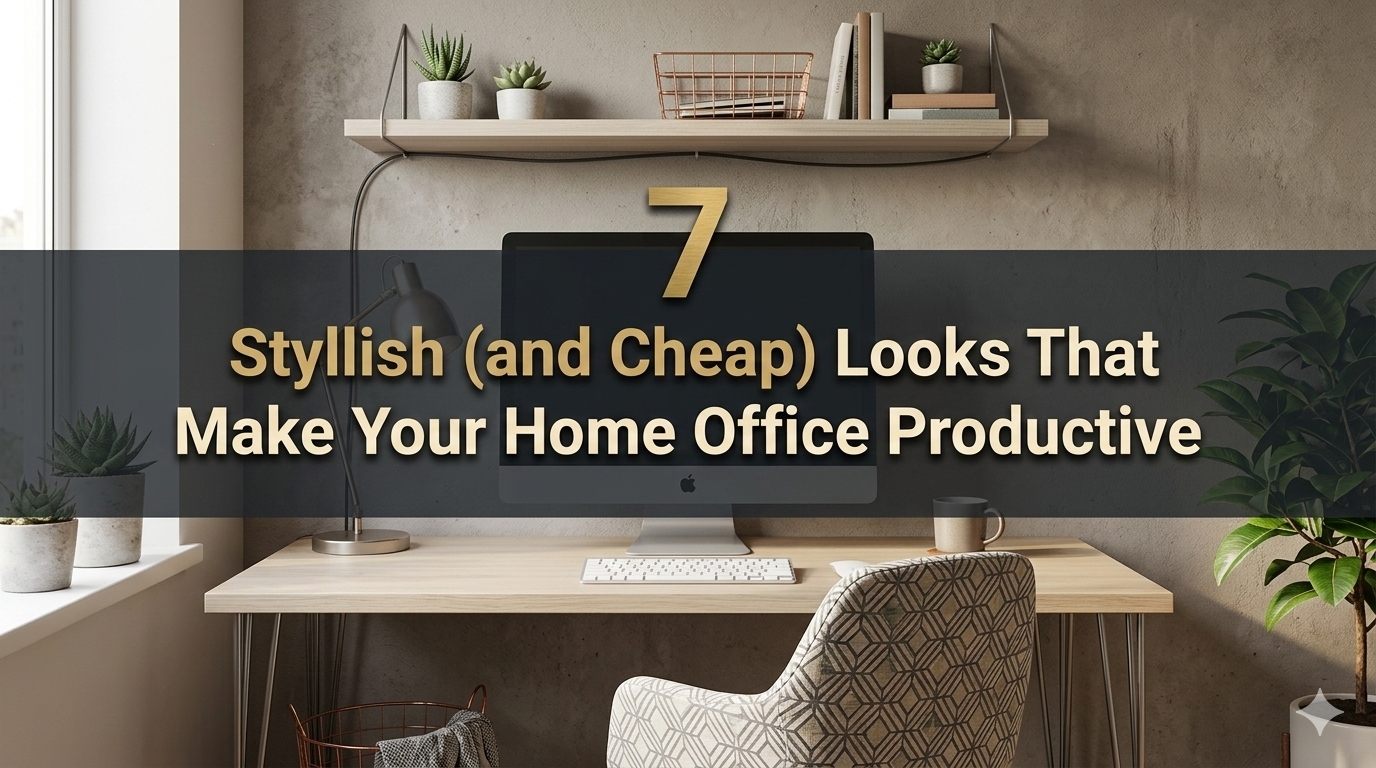
The work-from-home solution no longer feels temporary. It’s a lifestyle. But there is a catch — most people believe that an impressive home working space will cost thousands of dollars. The truth? All you need is ingenuity to craft a setup that’s functional and beautiful.
A budget home office productivity setup can look just as slick with the right decisions; it could belong in an interior design magazine. The secret is wise shopping, strategic placement and understanding what really matters for getting work done.
This guide dives into 7 real, tested setups that punch well above their price tags. When you’re done, whether you’re a student, a freelancer, a remote worker or side hustler, there’s one here that works for your life and for your budget.
Why Setting Up Your Home Office Is More Important Than You Realize
Before we delve into the setups, let us make one thing clear: your output is dependent on your workspace — finding that creative space to work.
A messy, dimly lit, uncomfortable desktop saps your concentration. A clean, well-lit, ergonomic environment helps lift your mood and keeps your brain active. Research has shown that a clean and organized workplace decreases stress levels and aids in concentration — and you don’t need high-tech equipment to cultivate such an environment.
The premise behind every budget home office productivity setup on this list is simple: you look good, you feel good, you work better.
What Makes a Home Office Look Expensive (Without the Expenditure)?
There’s a formula to this. Setups that look expensive have a few things in common:
| Element | What It Does |
|---|---|
| Clean cable management | Instantly removes visual clutter |
| Consistent color palette | Everything feels coordinated |
| Good lighting | Elevates the entire mood of the space |
| Minimal desk surface area | Look and feel premium, intentional |
| Quality peripherals (not quantity) | Fewer, better items beat many cheap ones |
Remember these five principles as you read through each setup below.
Setup 1: The Minimal White Desk Setup
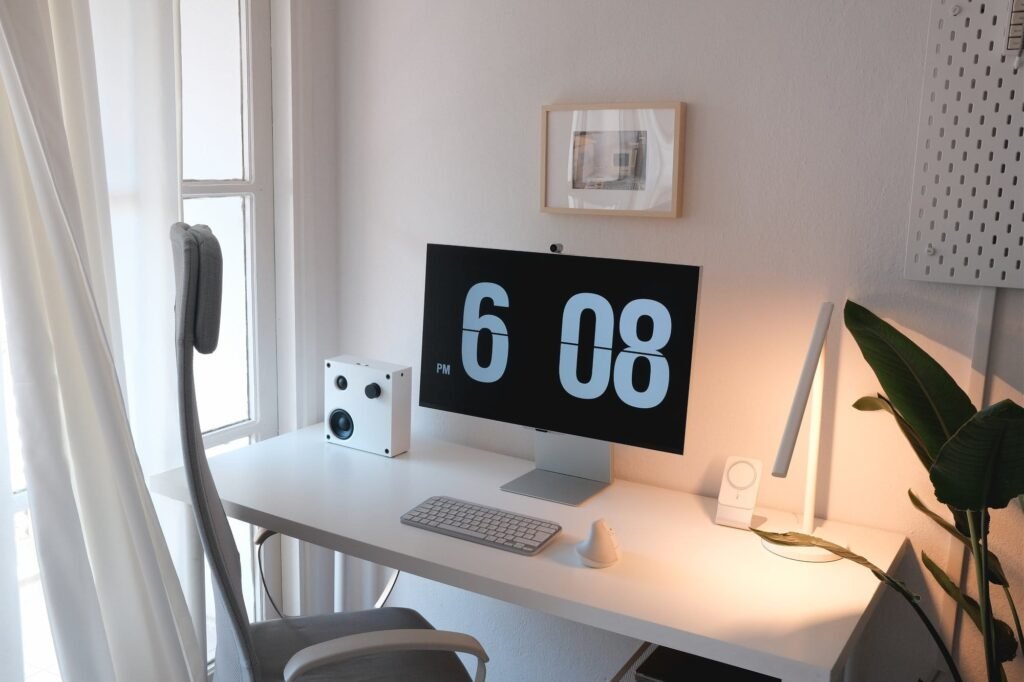
Estimated Budget: $150–$300
It is, for good reason, the most popular budget setup on this list. It’s clean, it photographs well and it’s very easy to assemble.
What You Need
It could start with a stark white desk. IKEA’s LINNMON or MICKE desks cost somewhere between $40–$80 and have been known to look surprisingly premium if styled correctly. Pair it with a white or light gray task chair — search Amazon or Facebook Marketplace for prices under $60.
A single monitor or laptop riser for around $25 elevates your screen to eye level. This alone makes the desk feel more purposeful.
The Finishing Touches
A small, potted plant (a succulent or a snake plant is under $10) brings life with no chaos. Get a cable management box to hide your power strip and cords behind the desk. These $15–$20 boxes remove 80% of the cheap look.
Get a big white or light wooden mousepad that covers most of the desk. Desk mats help to tie the whole setup together and these large ones cost under $20.
Why It Works
White reflects light. It makes all spaces feel bigger and cleaner. The monochrome palette obscures any budget differences between items and creates a seamless, cohesive look.
Setup 2: The Dark Academia Moody Desk

Estimated Budget: $200–$350
Not everyone prefers a bright white workspace. For a darker, richer aesthetic, the dark academia setup provides an impression that’s luxe and editorial.
Building the Base
Opt for a dark wood desk — or try wrapping a less pricey desk in contact paper to imitate walnut or even dark oak. Rolls of contact paper run about $15 and change the appearance of a surface entirely. This is best paired with a black or dark green task chair.
Lighting Is Everything Here
This setup lives or dies by its lighting. Choose a warm-toned desk lamp (amber or soft yellow bulbs) for $20–$35. This is what creates that cozy, rich glow you see in high-end home office photos.
Add some LED strip lights behind your monitor or underneath your desk shelf. Set them to warm amber. The layered lighting effect alone makes this setup look three times more expensive than it is.
Accessories That Seal the Deal
Dark-toned accents: a black notebook, dark leather (or faux leather) desk pad and wooden pen holder. Thrift stores are goldmines for stuff like this — small wooden boxes, vintage books and brass accents frequently cost less than $5 apiece.
Stack two or three hardcover books as a makeshift monitor riser. It has an editorial feel, and is free if you already have books.
Setup 3: The All-Productivity One — Dual Monitor
Estimated Budget: $300–$500
Dual-screen setups aren’t all about coders and video editors. Research proves this — dual monitor setups have been shown to improve productivity by as high as 42% for multitasking-oriented workloads.
Getting Two Screens Without Overspending
You don’t have to have matching brand-new monitors. Look for used 24-inch monitors on Facebook Marketplace, OfferUp or Craigslist — these typically go for $40 to $80 each. For most work tasks (writing, spreadsheets, video calls and research) a used monitor works just fine.
The Mount Makes the Difference
A dual monitor arm changes everything. It clears your desk surface, allows for exact height adjustment, and gives your setup that pro studio aesthetic. A good one from VIVO or Echogear costs $35–$60.
With the monitors mounted and your desk surface clear, the setup instantly looks high-end — even if the monitors themselves cost $50 each.
Keyboard and Mouse Pairing
A wireless keyboard and mouse combo makes a big visual difference. Logitech’s MK270 or MK295 combo costs about $30 and keeps your desk uncluttered. No messy cables make for a neat appearance every time.
What You Get at Different Price Points
Here’s a closer look so you can set realistic expectations:
| Budget Range | What to Expect |
|---|---|
| Under $100 | Basic functional setup — desk, chair, laptop stand |
| $100–$250 | Clean, stylish setup with good lighting and accessories |
| $250–$500 | Dual monitor or ergonomic focus with quality peripherals |
| $500–$800 | Near-professional setup with ergonomic chair and premium desk |
Most people will end up in the $150–$350 zone. That range encompasses everything you need to look and feel productive.
Setup 4: The Standing Desk Hybrid
Estimated Budget: $250–$450
Being sedentary all day takes a toll on your body. A standing desk setup is not only a health choice — it conveys that you care about your work. And no, you don’t need to spend $800 on a motorized desk to achieve this look.
Budget Standing Desk Options
IKEA’s SKARSTA manual crank desk costs roughly $200–$230. It’s simple, straightforward and good looking. There are also desk converters (platforms that rest atop your existing desk) for about $60–$100 that provide sit-stand options.
Making It Look Premium
Keep the surface minimal. A messy standing desk looks cluttered no matter how good the desk is. Keep only your monitor (mounted if you can), a keyboard, a mouse and one small accessory.
Use a cable management raceway (a plastic channel that adheres to the desk leg) to route cords neatly down the leg. These run around $10 and make a huge visual difference.
Add a neutral-colored — black or gray — anti-fatigue mat. This contributes both comfort and a purposeful, professional aesthetic to the floor space near your desk.
The Ergonomic Bonus
This setup indicates that you are serious about your health. And ergonomic setups — even budget versions — tend to make it easier to stay focused and less fatigued during long work sessions.
Setup 5: The Corner Genius (Great for Small Spaces!)
Estimated Budget: $150–$300
No dedicated office room? No problem. A corner setup makes the most of small spaces while creating a defined work zone in even a studio apartment or bedroom.
Corner Desks on a Budget
An L-shaped desk from Amazon or Walmart starts as low as $80–$120. Or build your own with two IKEA LINNMON tabletops set up in an L-shape using a corner leg kit — frequently cheaper and more customizable.
Vertical Space Is Your Friend
In tight quarters, build up instead of out. Install floating shelves above your desk (IKEA LACK shelves cost about $10 each) to house books, plants and accessories without using desk surface area.
A pegboard tucked above or next to your desk is another small-space superhero. You can suspend headphones, cables, small organizers and plants — all visible yet orderly. Pegboards run about $20–$30.
Light the Corner Correctly
Corner spaces can feel dark and closed in. To combat this, use a bright desk lamp positioned at your non-dominant side to reduce shadow. Setting up a small LED ring light or bias lighting behind your monitor also visually opens the space.
Setup 6: A Budget Studio for the Content Creator
Estimated Budget: $300–$550
If you are making videos, recording podcasts, doing Zoom calls or streaming, your setup has to look good on camera — not just in person.
Camera and Audio Basics
A $50–$80 webcam (Logitech C920 or comparable) shoots in 1080p and looks crisp on calls. An inexpensive USB microphone, such as the Fifine K669, costs about $30 and significantly boosts audio quality compared with built-in laptop mics.
Good audio matters more than good video. Viewers forgive blurry images. They click away from bad sound.
What Shows on Camera
Position your desk toward a window to take advantage of natural front-facing light. This is free and makes your skin tone and overall picture feel much more professional than any ring light.
Make sure you have purpose behind you on camera. A few books, a plant or two and a plain framed print will help you create a background that appears curated. Don’t leave walls blank — it can feel sterile. Skip busy walls — it’s frenetic.
The Bookshelf Background Trick
A bookshelf set behind you creates the impression of a professional study or studio. Stack it with a mix of books, small plants and simple objects in complementary colors. Professors, writers and executives have used this kind of background on camera for years — and it’s free if you already own the books.
Setup 7: The Ergonomic Focus Station
Estimated Budget: $300–$600
This arrangement prioritizes comfort and health. If you spend 6–10 hours a day working, ergonomics isn’t an option — it’s essential. And it doesn’t have to be expensive.
Budget Ergonomic Chair Options
A fully ergonomic chair from Herman Miller or Steelcase runs $1,000+. But there are solid alternatives. The Sihoo M18, Branch Ergonomic Chair, or used mid-range office chairs (secondhand) are $100–$200 and have lumbar support, armrest adjustability and a good seat depth.
Buying secondhand makes a lot of sense here. Office furniture is often in good condition and looks almost new.
Monitor Height and Eye Strain
The top of your monitor should be at eye level or a little lower. A monitor arm or simple riser can help with that. If you’d rather not rely on software filters, add a blue light filter screen protector (less than $15).
Keyboard and Wrist Health
A split or angled keyboard decreases wrist strain over extended sessions. Budget models from Logitech or Perixx cost $25–$50. Pair with a wrist rest (typically $10–$15) for a complete ergonomic setup that’ll actually protect your health in the long run.
Lighting for Eye Comfort
Bias lighting — positioning an LED strip behind your monitor — diminishes eye strain during long sessions by reducing the contrast between your bright screen and the dark room behind it. These cost $10–$20 and are one of the most high-value additions to any setup.
Pro Tips for Making Even the Cheapest Setup Look Expensive
Even with a $150 setup, these minor adjustments significantly increase the visual quality:
- Hide every cable. Zip ties, cable channels, velcro straps — nothing says “budget setup” like a knot of cords.
- Use one dominant color. Choose a dominant color for your accessories and be consistent.
- Keep the surface mostly clear. It should only show the basics.
- Add exactly one plant. One plant = intentional. Five plants = chaos.
- Frame something. One framed print or picture on the wall behind your desk lifts the whole room.
- Upgrade your chair mat. A transparent or dark chair mat on carpet or hardwood instantly tidies the appearance of your floor area.
For more inspiration and detailed guides on building the perfect workspace, check out Remote Work Desk Setup — a great resource for anyone looking to level up their home office on any budget.
Budget Home Office Productivity Setup: At-a-Glance Comparison Chart
| Setup | Best For | Budget Range | Visual Impact |
|---|---|---|---|
| Minimalist White Desk | Beginners, students | $150–$300 | ⭐⭐⭐⭐⭐ |
| Dark Academia Moody | Creative workers | $200–$350 | ⭐⭐⭐⭐⭐ |
| Dual Monitor Powerhouse | Multitaskers, analysts | $300–$500 | ⭐⭐⭐⭐ |
| Standing Desk Hybrid | Health-conscious workers | $250–$450 | ⭐⭐⭐⭐ |
| Small Space Corner Genius | Apartment/bedroom workers | $150–$300 | ⭐⭐⭐⭐ |
| Content Creator Studio | Streamers, YouTubers, podcasters | $300–$550 | ⭐⭐⭐⭐⭐ |
| Ergonomic Focus Station | Long-hour workers | $300–$600 | ⭐⭐⭐ |
Where to Shop Smart on Your Budget Setup
You don’t have to purchase everything new. Here’s where to find deals:
Online Marketplaces:
- Facebook Marketplace (monitors, chairs, desks)
- OfferUp (local pickups, no shipping)
- Craigslist (office furniture is always listed)
- Amazon Warehouse Deals (open-box items at a discount)
Retail Budget Options:
- IKEA (desks, shelves, accessories)
- Walmart (basic chairs, desks, organizers)
- Target (lighting, décor, accessories)
Budget Peripheral Brands Worth Trusting:
- Logitech (keyboards, mice, webcams)
- Fifine (microphones)
- VIVO (monitor arms and stands)
- BenQ (inexpensive monitors with excellent color accuracy)
According to Wirecutter’s guide to home office essentials, investing in even a few quality peripherals can dramatically improve both comfort and long-term productivity when working from home.
FAQs: Budget Home Office Productivity Setups
Q: What’s the single best upgrade I can make to my current setup for less than $30?
A: Cable management. A cable management box and a handful of velcro cable ties costs less than $20 total. Hiding your cords is the single fastest way to make any desk look cleaner and more expensive.
Q: Do I need a second monitor to be more productive?
A: Not always. A second monitor is most useful when the work involves comparing two documents, multitasking between apps, or reference-heavy work. If you’re doing focused writing or single-task work, one good monitor is all you need.
Q: Can I put together a home office setup for less than $100?
A: Yes, but keep expectations realistic. For less than $100, you can score a simple desk, a used chair and some cable management. It’s not going to be a Pinterest dream board, but it will work. As your budget expands, gradually add pieces.
Q: What’s the best way to have a standing desk on a budget?
A: A desk converter (roughly $60–$80) will be less expensive than an entire standing desk. It provides the sit-stand flexibility without a $200+ investment in a new desk. Well worth it if you sit more than 6 hours a day.
Q: Which color palette gives a budget home office a premium feel?
A: White and wood tones, all black/charcoal, or a black and white theme with one accent color (green plant, warm light or one item of colored decor). These combinations are classic, crisp and always make a space feel more expensive than it is.
Q: How important is chair quality to a home office setup?
A: Very important — particularly if you work long hours. A terrible chair harms your posture, endurance and even your morale. When you can, prioritize a secondhand quality chair over a new budget chair. A used mid-range ergonomic chair will likely outperform a new $50 option.
Q: How can I make my home office look good on video calls without expensive lighting?
A: Absolutely. Face a window for natural front lighting during your calls. It’s free and looks better than almost any ring light. Keep your background neat — one bookshelf with books and a plant really adds value.
The Real Investment Is in Your Attention to Detail
So what separates a budget home office setup that looks cheap from one that looks expensive? It’s not the price tag — it’s the intention.
Each setup on this list is totally attainable for actual people with actual budgets. The bare white desk, the brooding dark corner, the dual monitor powerhouse — all of them are predicated on a single idea: having fewer things, better situated, with more intention.
You don’t have to have the most high-end chair, the latest monitor, or a custom-built desk. You want a clean surface, decent light, invisibly managed cables and a single visual aesthetic. That’s it.
Start with what you have. Add one upgrade at a time. Within a few months, you can have an inexpensive home office productivity setup that legitimately impresses people — and yourself.
Your environment defines how you think, feel and the amount of work you get done. It deserves attention. And the good news? That kind of attention is free.